Showing posts with label chicken. Show all posts

Monday, October 20, 2014

A Fall Comfort Food Favorite: Chicken & Pinched Dumplings

Chicken & Pinched Dumplings
I love autumn weather. I love having the windows open and feeling the crispness in the air! And when that time of year hits, I go soup crazy! I mean, what is better than a bowl of soup, some good bread and a cozy fire. It’s just heaven for me!

Reality is that I am in L.A. Fall is relative around here. The other day I saw a lady in fleece lined boots and a big coat on because it was 64 degrees that morning. Okay. I get it. When you get a chance to wear something winterish in L.A. you go for it. I understand her excitement. However, I had on capris and my flip flops.

But the dip in morning temperatures gave me the perfect excuse to make an old family favorite; Chicken & Dumplings. I love me some chicken and dumplings. Everything you need is right in that little bowl; the ultimate comfort food.

The only two variation I made in my standard recipe was to add two new ingredients. First, I saw a segment on Food Network where the host was using a parsnip. We never grew parsnips. I have never eaten a parsnip. But she made it look good and said it was a cousin to a carrot so I decided to give it a go. The other ingredient was a new spice blend that I saw on the top shelf of the Kosher food section; a poultry blend. It has salt and all sorts of spices and dried herbs. So glad I followed that impulse to buy it!

Before I started cooking I took a poll of my Facebook friends to see which type of dumplings they preferred. The two types are rolled/cut dumplings or the drop dough type of dumplings. I was surprised to see how many do the drop type. I took the advise of one friend and tried her approach. She makes the dough for the rolled out dumplings but pinches the dough instead of cutting it. So, that is the technique I used for this recipe. It was just as fast as doing the drop style. The texture of these pinched dumplings is just like the cut kind, kinda chewy. In my experience, the drop type is a little fluffier than the chewy version. So, it is up to you. Roll/cut, drop or pinched. Here is what I came up with to share with you.

Chicken & Pinched Dumplings

Serves: 6-8
One Pot Meal

Ingredients:

  • 2 Large chicken breasts, cubed
  • 2 boneless skinless chicken thighs, cubed
  • 1 large parsnip, chopped
  • 3 medium carrots, chopped
  • 1 large onion, diced
  • 3-4 celery ribs, chopped
  • 1 49oz can chicken broth
  • 2 regular cans chicken broth
  • 5-6 fresh sage leaves (optional)
  • 2 TBS butter
  • 2 TBS olive oil
  • Seasonings: Poultry Blend seasoning or salt, black pepper, garlic,  dried herbs; sage, thyme, parsley and whatever else you like that goes with chicken.


Instructions:  Part 1

  1. In a soup pot, add a TBS of oil with the butter and begin browning the chicken, seasoning it liberally. 
  2. When the meat is 80% cooked, spoon it out and into a mixing bowl to set aside.
  3. Now, add your onions and celery to be bits left in the pot and begin to saute them until the onions start to turn clear. Add the fresh sage leaves.
  4. Next add the parsnips and carrots to the pot. Cook for a couple of minutes.
  5. Pour the chicken and the juices back into the pot and give a good stir.
  6. Add all the chicken broth and bring the soup to a boil.
  7. Cover and reduce the heat to low while you are mixing up the dumpling dough.
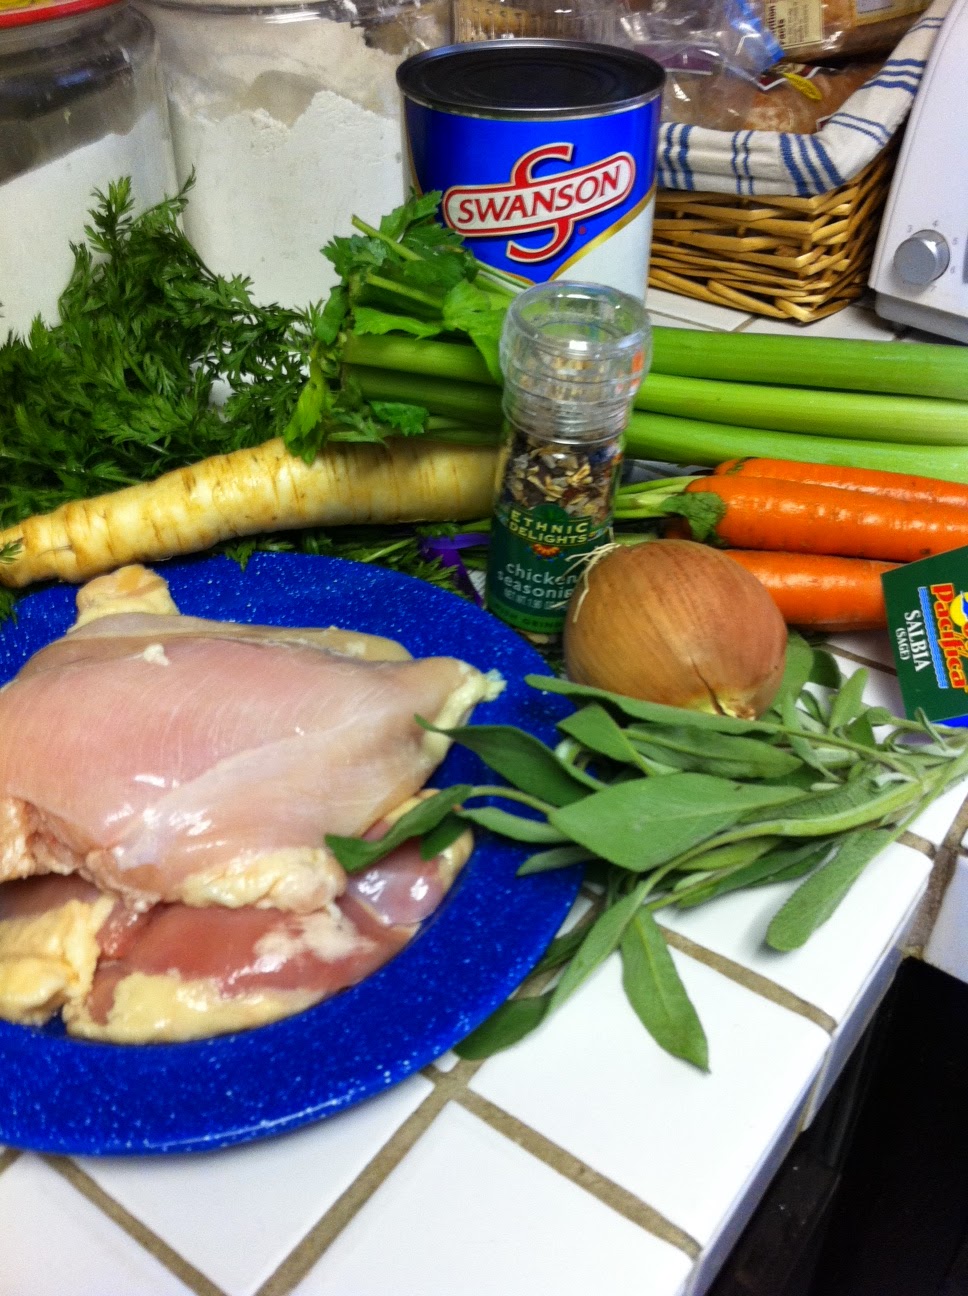
Get all the ingredients gathered
Everything is chopped and ready
Chicken is about 80% done
Celery and onions
Add the Carrots and Parsnips


Dumplings
Ingredients:

  • 2 cups all purpose flour
  • 1 tsp baking powder
  • 1 TBS Crisco
  • 1 tsp Crisco
  • 1 pinch salt
  • 1 pinch black pepper
  • 3/4 cup cold water
Instructions:  Part 2
  1. In a large mixing bowl combine flour, baking powder, salt, pepper. 
  2. Cut the Crisco into the flour mixture using a fork. 
  3. Slowly add the water until you form a dough ball.
  4. Score the dough ball into strips that make pinching the dough a little easier
All the dry ingredients and Crisco
Cut the Crisco in with a fork
Add water slowly and mix into a ball
Score to make pinching easier


Instruction: Part 3 - The final stage!

  1. Take the lid of the chicken soup, fish-out the sage leaves and return the mixture to a boil.
  2. Pinch dough into “Hershey Kiss” size pieces and drop one at a time into the hot broth.
  3. Make sure to let a few seconds pass before you add another layer of dough balls. You don’t want them to stick to each other.
  4. As the dough gets done, it will float to the top.
  5. When all the dough is in the pot, reduce the heat back to low, put the lid on and cook for 20-minutes.
It will look like this as it cooks
Ta-Da! Chicken & Dumplings


Your house will smell SOOOOO good! BTW this recipes freezes well. So bake a big batch and freeze it in serving size containers to enjoy all winter! This is also an ideal recipe to use with leftover roast chicken or to use up all that turkey from Thanksgiving.

Now, a few blogs ago I posted a scones recipe. I took that same recipe and made it savory to eat with my Chicken & Pinched Dumplings. Just omit adding sugar to the dough and use fresh or dried herbs like sage, thyme or rosemary and a little black pepper instead of the dried fruit. I also brushed them liberally with butter. So good!

I hope you give this a try. It reads like there are a lot of steps, but it’s a ONE-Pot-Meal. The cleanup is so easy! Bowls and spoons!

Let me know how it worked for you and send me the photos of your success! I’d love to show everyone!

As the mixing bowl turns,
Donna ; - )


Monday, June 9, 2014

Auntie Donna’s Fried Chicken: Inspired by Great-Granny DeVault’s basic family recipe.

Fried Chicken, after the first turn.
My last conversation in June of 2001 with my Daddy Jack was about his childhood memories of his Granny DeVault’s fried chicken. He was venturing back to his early years of helping her out in her store, mid to late 1930s. He gave vivid details, recalling exactly how she fried her chicken. That must have been some kind of good for a little boy about eight years old to pay that much attention. I wrote everything down that he mentioned. However, I will not be going out back to kill, scald and pluck two medium sized chickens for this blog. Sorry, you will be coming up a bit short of my Great-Granny’s recipe's freshness. But other than that, I will share all the details with you.

He was adamant that I use a cast iron skillet with a lid. Her basic technique was to add the chicken to the hot oil and cook it for 10-minutes, then turn it, cover it with the lid, turn the heat down to low, cook another 10-minutes, take the lid off, turn the heat back up to crisp the chicken skin again and it was done! That seems like a lot of fuss, but it is a great process to follow. However, my guess is that her barnyard birds were smaller than what we are getting these days packaged up in our grocery stores. I tried that cooking style with a pre-cut up fryer from the store and my crust looked great...but the inside was still pink...cause my chicken had a lot more meat on it’s bones.

So, this version is in the ‘spirit’ of my Great-Granny’s recipe. I have had to make a few adjustments to his instructions, plus am I really to trust a memory from 66 years ago? I think not. This basic recipe has been passed along to many others since my conversation with Daddy Jack. I even spent 45-minutes with my sister-in-law, on the phone from start to finish, walking her through each step. (If only there had been iPhones in 1999.) She has now made the recipe countless times for her three boys, who call it Auntie Donna’s Fried Chicken. I kinda feel for her. She’s the one who has been making it for them all these years, and it’s still not her chicken? Oh well.

Auntie Donna’s Fried Chicken

Ingredients:

  • 1 whole chicken, cut into 8 pieces, 9 if you wish to cook the back (I save the back for soup stock)
  • 2 eggs
  • 1 cup milk or buttermilk
  • 1 TBS hot sauce
  • 2 cups all-purpose flour, seasoned
  • Flour Seasonings: salt, black pepper, garlic powder...is basically all you need.  But I add in ground sage, parsley flakes, oregano, cayenne, paprika, chili powder, onion powder, basically anything I want to add in the spice rack. I get in trouble from people wanting exact measurements on the seasonings...sorry I do it all by feel/look. I’d say a teaspoon of everything would be a safe way to start.

Instructions:

  1. Wash and pat dry your chicken pieces with a paper towel, season on all sides with salt, black pepper, garlic. Just make sure it is not cold right out of the fridge. Adding super cold chicken to the hot oil will drop the temp and make your crust soggy.
  2. Make a wet tray that consists of your eggs, beaten in with milk, salt, black pepper, garlic.
  3. Make a dry tray that contains your seasoned flour.
  4. Coat the chicken pieces, one at a time with the egg wash mixture.
  5. Next, roll them in the seasoned flour, shaking off the excess.
  6. Gently place them in a skillet of hot oil.
  7. Cook pieces according to size. Put breasts, thighs together...they take the longest...legs, wings and back take the least time.
  8. Add your chicken pieces gently. Don’t crowd the skillet. 4-5 pieces at a time will give all the sides room to brown up evenly. A crowded skillet brings the oil temp down and makes for soggy greasy chicken.
  9. Monitor the chicken and after about 8 minutes, turn it over...that is, if the batter is the shade of golden brown you desire. If it’s too light, cook it a little longer. 
  10. Once turned, cook for another 8-10 minutes.
  11. I cook the breasts and thighs first, then the last round is for wings, legs.
  12. I also line a cookie sheet with foil and place a wire rack inside. When the breasts and thighs are browned on both sides, I put them on a rack and into a 250 degree oven. That keeps them crisp and helps them finish cooking while I start the legs and wings.


Skillet Instructions:

  • I generally use my cast iron skillet. Sometime I use the lid technique, sometimes I don’t. In the case of these chicken legs pictured, I did not.
  • Fill your skillet half full of vegetable oil. Turn your heat up to medium. Make sure your oil is fully hot when you start adding the chicken. If it isn’t sizzling when the chicken is added, you will get greasy soggy crust. Test the oil by putting the tip of a fork in the egg wash, then put the eggy tips down in the hot oil. If it immediately starts cooking and forming little beads, then the oil is ready. If not, wait a while longer and/or turn your heat up a bit.

Frying Station: Egg, flour, into the skillet!
Coating with seasoned egg wash mixture.
Rolling in seasoned flour.
Oil on medium heat.
Auntie Donna’s Fried Chicken

Common Mistakes:

  • Medium hot oil is what you want to achieve...not oil heated on High. All you will have is the best looking golden brown crust and raw chicken in the middle. Consistent heat is the key.
  • Adjustments are easily made to the process. If your chicken pieces seem pretty hefty, then cook them each a little longer. If it looks like a scrawny little chicken, then cook it less. If the oil seems too hot and the batter is browning too fast, turn the heat down a little. If it isn’t sizzling like in my photo, then turn the heat up. 
Don’t get scared away by all the steps and over abundance of instructions. Fried Chicken is pretty easy and it’s a quick way to have a protein ready for any meal. 

You can use this same recipe on boneless skinless chicken breasts or chicken tenders. It’s best to let the chicken soak in milk seasoned with a couple of shakes of hot sauce for at least 20-minutes. Then the egg and flour steps will hang on a bit better...and you will have a nice crust.

Let me know how it goes! I’m anxious to hear if this 90-something-year-old recipe will be passed along in your family, too!

As the mixing bowl turns...or in this case, as the skillet sizzles,
Donna ; - )


Wednesday, June 4, 2014

Quick Healthy Meal: Chicken Spaghetti with Oven Roasted Pattypan Squash Medley and Jazzed-Up Crescent Rolls

Ever have leftover chicken or turkey. Are you tired of always making either chicken salad or turkey salad out of it? Well, if you cannot relate, just read along anyway, cause today’s blog is about using up leftover poultry meat and making Chicken Spaghetti.

Chicken Spaghetti with Pattypan Squash
It’s usually around 3:30 in the afternoon when I realize I need to do something about supper. Like right now, it is 3:15 here and I haven’t a clue. So, instead of dealing with the problem, I’m gonna blog about it and then most likely have a pizza delivered. That’s just the way I roll these days.

But back to the recipe... At the last minute, my daughter had a friend come over on Saturday. It was too late for me to go to the store, so I had to come up with something hearty, nutritious and in a hurry. She and her friend had been hiking and I knew they would be hungry. I always have pasta of some sort in my pantry, and a jar or two of my favorite spaghetti sauce. However, I did not have anything to make a beef or sausage based meat sauce or meatballs (by the way, my meatball are fab!) out of; but I did have leftover chicken! I’ve seen Chicken Spaghetti on menus before, but I had never eaten any. It was worth a shot.

Here is my version of Chicken Spaghetti. I also rounded off the meal with Oven Roasted Pattypan Squash, mixed with other vegetables.

Chicken Spaghetti

Skillet meal: 30 minutes
Serves 4-6

Ingredients:

  • 1 box thin spaghetti, cooked according to package directions
  • 2 cans or jars of your favorite spaghetti sauce
  • 2-3 large chicken breasts, cooked, shredded
  • 1 cup chopped onions
  • 1 cup chopped green bell pepper
  • 1 cup chopped other colored bell pepper (they are sweeter)
  • 2-3 cloves chopped garlic
  • 1/8 cup chopped Mild Banana Pepper rings (in the pickle section)
  • To taste: salt, black pepper, garlic powder, dried Italian seasoning blend, dried oregano, red chile flakes...basically anything that you like and makes you think of Italian flavors.

Instructions:

  1. As your pot of water is heating up to cook your pasta, in a large skillet with a lid, add a drizzle of olive oil and begin to sweat the onions, garlic and peppers.
  2. After the onions become clear, add your shredded chicken
  3. Next add the seasonings
  4. Pour on the spaghetti sauce and mix well.
  5. Let simmer at least 15-20 minutes so that all of the flavors meld together
  6. Serve over cooked pasta, top with parm or your favorite cheese
Sauteed onions, garlic and peppers.

Shredded chicken and Italian style seasonings.

Simmer with favorite spaghetti sauce.


My husband came home from the farmer’s market this week with pattypan squash. I had never eaten pattypan squash. It tastes just like the yellow crook-neck squash I grew up eating. You can bake it, stuff it, batter and fry it. In this case, I oven roasted it. I love oven roasting my veggies, it makes their true flavor come through and gives them a rich, sweet taste.

Oven Roasted Pattypan Squash Medley

Oven: 400 degrees
Time: 15 minutes

Ingredients:

  • 3 cups yellow squash, cubed
  • 2 cups zucchini, cubed
  • 1 cup chopped onion
  • 1 cup mini carrots

Instructions:

  1. Place all prepared veggies on a cookie sheet that has been lined with foil or parchment paper
  2. Drizzle with olive oil
  3. Add salt, and black pepper
  4. Toss until all veggies are coated
  5. Roast in the oven set on 400 degrees for 15 minutes
  6. You may stir around a couple of times to prevent uneven browning or sticking
Yellow Pattypan Squash

You can add any veggie you like to this recipe.


Actually, you can put a roll of jazzed up crescent rolls in the oven at the same time as the veggies. The rolls will be finished a couple of minutes ahead of the veggies, but you will get two thing accomplished at the same time.

Jazzed-Up Crescent Rolls

My family loves crescent rolls. The only downside to jazzing them up, is that I have to make twice as many of them. They are always a big hit! Buttery, flakey and now garlicky!

Ingredients:

  • 1 or 2 tubes crescent rolls
  • To taste: garlic salt or powder, parsley flakes, grated parm cheese


Instructions:

  1. On a cookie sheet lined with parchment paper, arrange all the crescent rolls according to the package instructions.
  2. Sprinkle with garlic, parsley and parm...as much as you wish
  3. Bake according to package instructions

Crescent rolls ready for the oven.

Golden, buttery, garlicky, flaky goodness!

Canned biscuits with garlic, parm, parsley and a little olive oil drizzle.

They are sooooo good!

There were four of us at supper. I made 16 rolls....only two rolls remained. That’s how good they are. You can do the same thing with canned biscuit dough...pretty much the same outcome and response...they just disappear!

Instead of focusing on just one item this time, I decided to give you an idea for a whole meal. I started the meal with a basic green salad. The hikers and my husband seemed to enjoy every bite and washed it all down a gallon of sweet tea.

So next time you have company pop over unexpectedly, don’t panic. I bet you have enough stuff right there in your pantry and crisper to make a great meal!

As the mixing bowl turns,
Donna ; - )