Wednesday, May 28, 2014

Oatmeal Cookies on a whole nother level: Organic Multi-Grain Oatmeal Cookies

Organic Multi-Grain Oatmeal Cookies
Last night, I told my daughter I would get up early to make a batch of oatmeal cookies to take to her friend’s house. It’s sad, but as a southern woman, I cannot seem to allow my children or spouse to show up empty handed when visiting someone. As my luck would have it, I only had one cup of instant oatmeal left in the container on my pantry shelf. Drat. I don’t want to go to the store at 7 a.m.

Organic Multi-Grain Oatmeal
I then remembered that we had a visitor a few weeks ago that was a “healthy” eater. I had purchased a number of organic items for her, one being multigrain instant oatmeal packets! I’m saved! This particular organic oatmeal also contained wheat, quinoa, rye and flax seeds. These cookies will not only be good, but they will also be healthy! (I have always convinced myself that eating a couple, or three, oatmeal cookies in the morning for breakfast was equivalent to eating a bowl of oatmeal. Rids the guilt.) But please know that you do not have to use organic, or even multi-grain products in this recipe. Plain old quick oats are perfectly fine to use.

In full disclosure, the only portion of this recipe that is totally organic is the multigrain instant oatmeal. The rest could have been organic, if those products had been purchased by me at my local grocery store.  There are whole sections now, dedicated to ingredient conscious cooks. I could have probably even made them gluten-free if I had that type of flour as well. So the name is sorta misleading, but it isn’t a full fib. I did use Organic Multi-Grain Oatmeal. There. I feel better.

This cookie is nutty, buttery, semi-soft and not overly sweet. It’s packed full of energy boosters and nutrition that will keep you going all morning if you eat them with your morning cup of coffee or tea. The yield is 6-dozen, so feel free to freeze half the dough to use another day if the batch is too large.

A few years ago I purchased a stainless steel scoop to use for cookie dough and melon balls. I had a plastic one that just wouldn’t let go of the dough I scooped up in it. This one is much better. Plus, it keeps the cookies uniform in size. I used the two-spoon method for years. I had horrible technique, so the scoop was added to my utensils drawer.

The cookie received rave reviews from my daughter this morning. Two dozen, plus a gallon of sweet tea are headed to a swimming pool in Calabasas as I type! I hope her friends enjoy them.

Organic Multi-Grain Oatmeal Cookies

Oven temp:  375 degrees
Yield:  6 dozen

Ingredients:

  • 1 cup butter, margarine softened
  • 1 cup granulated sugar
  • 1 cup brown sugar, firmly packed
  • 2 eggs
  • 2 tsp vanilla extract
  • 2 cups all-purpose flour
  • 2 tsp cinnamon
  • 1 tsp salt
  • 1 cup instant oats, uncooked
  • 2 cups organic multi-grain instant oatmeal, uncooked
  • 1 cup nuts, chopped (I used sliced almonds, but any nut will do...you could also use raisins if you wish.)


Instructions:

  1. Cream butter, sugars until smooth.
  2. Beat in eggs and vanilla
  3. Add flour, cinnamon, baking soda and salt
  4. Fold in oats and nuts
  5. Chill in fridge for 10 minutes. (makes scooping easier)
  6. Arrange scoops on either a greased cookie sheet, or a sheet lined with parchment paper
  7. Bake 10-12 minutes. (10 for chewy cookies, 12 for crisp cookies)
  8. After cooling store in an air-tight container.


Multi-Grain: flax, oats, barley, wheat, quinoa and rye
Chilled cookie dough ready to scoop.
Oatmeal cookies ready for the oven.
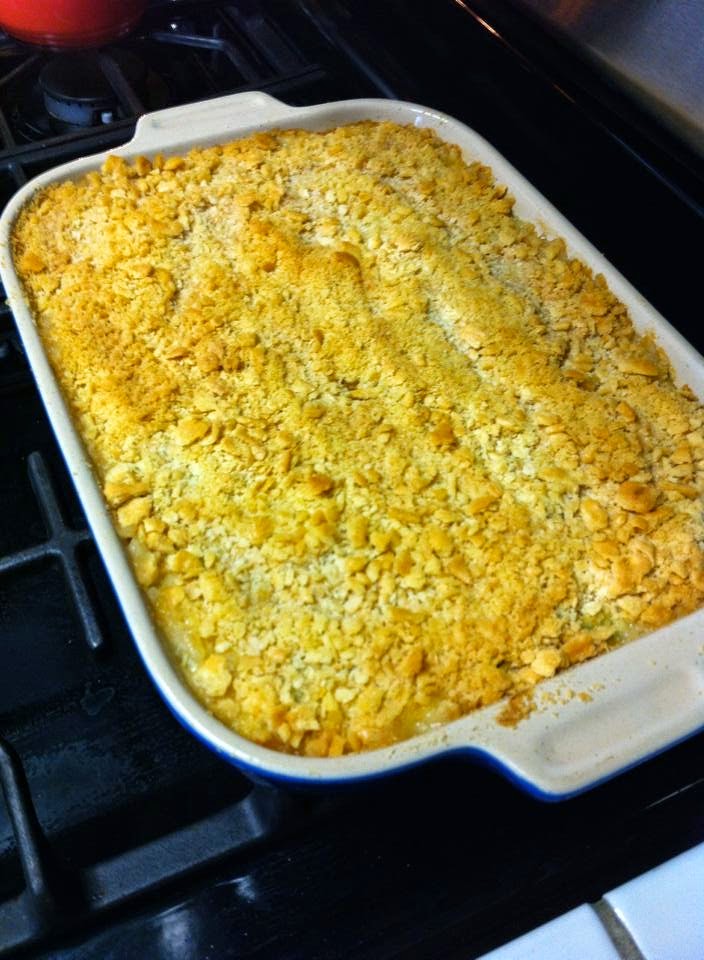
Multi-Grain Oatmeal goodness!
Organic Multi-Grain Oatmeal Cookies

I used a combination of quick oats and the organic multi-grain oats. You could use all of either. It’s just up to you. Please let me know if you try this recipe and tell me how they turned out!

A wonderful woman passed on today. A woman that touched more people than we can count. I will end this blog with a photo of her and one of her inspirational quotes that we should all take to heart. R.I.P. Miss Maya. We are all better for having listened to your words.

As the mixing bowl turns,
Donna 

Maya Angelou

Monday, May 26, 2014

Everybody in the pool! Mango Apple Coconut Almond Crumble


Mango Apple Coconut Almond Crumble
As I write this blog, my house is filled with the smells of butter, sugar, cinnamon, and nutmeg cooking...it’s so difficult to concentrate! But duty calls, so here it goes!

Ever have items in your pantry or fridge that you feel the need to cook before they go bad? That’s what happened this morning. I had some mango and pineapple in my fridge, I was out of the Blueberry Zucchini Bread I had baked a few days ago, and I wanted something sweet, but not a cold bowl of fruit.

I spent about 30-minutes online looking up mango recipes. Huh...people in Hawaii make all sorts of stuff out of mangos! I finally decided on a crumble recipe and started pulling ingredients out to get going. Sadly, the pineapple in my fridge was a casualty of procrastination. It had gone bad. Now, what to do? I wanted another fruit in my mango crumble. As luck would have it, I had a purchased a small bag of dried apples at the local farmer’s market. That would work!

Here is my jazzed up version of a mango crumble. I think you can put about any type of fruit combination to use in this recipe, dried or fresh fruits. Wouldn’t matter. And since this was an experimental recipe, I did not make a large amount. This will make 4-6 servings. So, you can double or triple it if you wish to make a large baking pan full to take to a special event or for your crowd at home.

Mango Apple Coconut Almond Crumble

Serves: 4-6
Oven: 350 degrees
Time:  30-minutes

Ingredients:

Filling:

  • 1 large mango sliced into strips
  • 1 cup dried apples, chopped
  • 4 TBS butter
  • 1/3 cup brown sugar
  • 1/2 tsp cinnamon
  • 1/4 tsp nutmeg
  • 1/4 tsp ground ginger


Topping:

  • 4 TBS butter, softened
  • 1/2 cup flour
  • 1/4 brown sugar
  • 1/2 cup quick oatmeal
  • 1/4 tsp cinnamon
  • 1/2 cup shredded coconut
  • 1/2 cup almonds (or nut of your choice)


Instructions:

  1. Preheat oven to 350 degrees. 
  2. Place filling ingredients in a large skillet and saute on medium low for 5-10 minutes, until mango has softened a bit.
  3. In another bowl combine topping ingredients, adding coconut and almonds last. Mix well.
  4. Bake for 30 minutes. Check after 20 to make sure topping is not overcooking. If it looks too brown, place a piece of foil loosely over the top and finish cooking. Remove foil during last minute so that the topping may crisp back up.
  5. Serve with vanilla ice cream or whipped topping.
1 large mango sliced, 1 cup dried apples
Saute mango, apple and spices
Fruit filling in small casserole dish
Crumble dry ingredients and butter.
Adding coconut and almonds
Crumble added to the fruit mixture.
Mango Apple Coconut Almond Crumble


Tangy, sweet, spicy, yum! Wish you could smell it, too! Again, I think you could use all sorts of fruits in this recipes; pears, plums, peaches, nectarines, pineapple, blueberries, raspberries....you get the idea. Make a fruit combo of your own and share it with us! Send me the photo and I’ll post it on my blog!!

Cooking is a fun, creative outlet for me. Some people scrapbook. I cook. It isn’t difficult. I mess up all the time...just ask my family. But at least I give it a try. You can, too!

By the way, if you have any food ideas you’d like to see me tackle, just let me know! I’m game!!

As the mixing bowl turns,
Donna ; - )


Saturday, May 24, 2014

Say Cheese!...and Broccoli: Oven Roasted Broccoli Deliciousness


Oven Roasted Broccoli with Garlic and Parm
Over the years, our friend broccoli has had a mixed relationship with politics, the press and the entertainment industry.  First, we have a President that says he doesn’t like broccoli. I mean really. What mom can get their kid to eat broccoli when the leader of the free world says he doesn’t like it and won’t eat it? Not cool, George. Not cool at all. I bet Barbara called after that was the sound bite for the week. Yeah, you are never too old for a call from your mother.

However, it seems like every other week there is a new health study extolling the virtues of broccoli and how it will keep us looking younger, free from cancer and help us live longer. All of that sounds great, but how do you get a kid, or close minded adult, to eat broccoli? Back in the 80s the answer was a heavy yellow cheese sauce. Well, all the healthy qualities were actually drowned in a sea of fat and calories. And you can’t say the cheese was a dairy serving! We aren’t playing that game again.

Thankfully, in the 90s a little cartoon series named “Veggie Tales” came along and made vegetables entertaining. Only problem, who else had kids that said, “Mom, I can’t eat Larry!”?? Yeah, my two tried that line of reasoning. Didn’t work, but they gave it their best shot. However, I will say that my kids have been pretty good about eating their vegetables, other than the disastrous broccoli rabe incident of 2004. That little Giada made it look amazing on TV and it just did not translate well in my kitchen.

I love that Pinterest is full of creative ways to chop, cook and serve vegetables to our families or for social gatherings. One of the first vegetable recipes I tried was for oven roasted broccoli. The photo was  of a sheet pan covered in chopped broccoli, glistening with oil (or butter), little pieces of garlic and browned bits of parmesan cheese. I have found this recipe works on just about any veggie you would like to roast in the oven on a cookie sheet. It’s a quick, and easy way to whip up a side dish. Plus, if you use foil, there is nothing to wash up. Even better.

Here is my version of Oven Roasted Broccoli. Roasted vegetables, of any kind, take on a much sweeter, richer flavor when cooked in the oven. This recipe is no exception. Each element elevates this simple side dish and makes it a featured item of the meal. The fresh garlic and parm makes the broccoli addictive. The little bits of lemon juice adds a freshness and zip to an otherwise plain vegetable. I hope you give it a try.

Oven Roasted Broccoli

Oven:  400 degrees
Time:  15 min
Serves: 4-6

Ingredients:

  • 2 heads of fresh broccoli, washed and chopped
  • 2 cloves garlic, minced
  • Olive oil
  • Parmesean cheese, grated
  • salt, black pepper
  • 1/2 lemon, juiced


Instructions:

  1. Prepare a cookie sheet by lining it with foil or parchment paper.
  2. Drizzle olive oil on the prepared sheet pan
  3. Arrange chopped broccoli over the surface of the pan.
  4. Sprinkle the top with garlic, cheese, salt, pepper, lemon juice and a drizzle of olive oil
  5. Toss the broccoli with your hands until all the pieces are covered with all the added ingredients.
  6. Bake for 14 minutes...longer if you wish to have it more tender...but watch not to burn the edges.

Broccoli before adding ingredients for roasting.

Oven Roasted Broccoli in all of it’s delicious glory!

Technically, there is cheese on this broccoli, but it is more of an accent to the vegetable instead of an attempt to cover it up. I think your family will like it as much as mine does.

Enjoy your Memorial Day Weekend! Let me hear how this and any of my other recipes worked out for you!

As the mixing bowl turns,
Donna : - )


Thursday, May 22, 2014

Early Morning Booster: Blueberry Zucchini Bread

Blueberry Zucchini Bread
Zucchini Bread replaced Banana Bread years ago in my kitchen. I think I just made way too much banana bread; using up the bananas as they darkened when the kids were little. But one day, I was given a small loaf of zucchini bread and I instantly had a new favorite breakfast cake. (My second favorite now is Strawberry Bread, but that’s for another blog, another day.)

This bread is always moist, flavorful and is a great way to use up zucchini from your garden! The cinnamon and nutmeg make the house smell amazing! And if you have picky eaters, they will never know that there is zucchini in the bread. So feel free to name it whatever you wish in order to get your family to eat it.

Originally, this recipe called for nuts. Well, I didn’t have any nuts, but I did have a cup of blueberries in the fridge. So, once again, this recipe was crafted in order to alleviate a trip to the store and use up items I had on hand. Thankfully, the flavor combination worked. Plus, blueberries are really good for you. It is a Win/Win!!

Blueberry Zucchini Bread

Makes 2 Loaves, freezes well
Preheat oven to 350 degrees

Ingredients:
  • 3 1/4 cups all-purpose flour
  • 1 1/2 teaspoons salt
  • 1 teaspoon ground nutmeg
  • 2 teaspoons baking soda
  • 1 teaspoon ground cinnamon
  • 3 cups sugar
  • 1 cup vegetable oil (I used canola)
  • 4 eggs, beaten
  • 1/3 cup water
  • 2 cups grated zucchini
  • 1 teaspoon lemon juice
  • 1 cup blueberries
  • Optional:  you can use one cup of chopped nuts instead of, or with the berries.

Instructions:

  1. In a large bowl, combine flour, salt, nutmeg, baking soda, cinnamon and sugar. 
  2. In a separate bowl, combine oil, eggs, water, zucchini and lemon juice. 
  3. Mix wet ingredients into dry, add blueberries and fold in. 
  4. Bake in 2 standard loaf pans, sprayed with nonstick spray, for 1 hour, or until a toothpick comes out clean. 
  5. Or, bake in 5 mini loaf pans for about 45 minutes.
  6. Another option is to grease the loaf pan, then make a cinnamon/sugar mixture and instead of flouring the loaf pan, use the cinnamon/sugar. This will give it a nice sugary crust around the edges. Works great on bundt cakes, if you don’t want to make an icing or glaze.


Wet ingredients

Dry ingredients
Bread batter


Grated zucchini
Grated zucchini and blueberries


Added to the batter
Gently fold zucchini and berries into the batter


Blueberry Zucchini Bread hot out of the oven!


Moist and delicious Blueberry Zucchini Bread

One loaf, I made in a foil loaf pan and put it in the freezer after it had cooled. I wish this blog had a scratch/sniff button! Oh, it smells great....and tastes even better than it smells! Plus, you are getting a serving of vegetable and a fruit! This is health food we’re making here!

It’s been quite interesting to see what people read most on this blog. Though we all claim to be eating better, the sweets I have posted have gotten four times the hits than the savory recipes! I have no way of knowing which ones people are cooking. LOL!

Enjoy this holiday weekend with your family and friends and remember those that fought and died for us while serving this country. Because of them, we remain free.

As the mixing bowl turn,
Donna ; - )


Stuffed Peppers Ole’: A Mexican twist to an old favorite.

Stuffed Peppers Ole'
Arthur has been after me for years to make stuffed bell peppers. My mom never made them. She doesn’t care for rice, so anything made with rice as a main component was never created in her kitchen.

Every Wednesday there is a farmers market where Arthur works and he brings home the most gorgeous produce. This week, he brought home peppers and asked if I would give stuffed peppers a go. So, after Googling and looking over a number of recipes, I created this Mexican favor version.

Mexican flavor profiles are vital in my household. We lived in New Mexico for over 7 years, my husband is a Texan and well, we just love all types of Mexican food. So, it was quite easy to substitute this and that and create a combination that would satisfy my family’s tastes in cuisine. I substituted ground beef for sausage; regular diced tomatoes for Rotel tomatoes; and added a little green chile, chili powder, chile flakes, cilantro flakes and cayenne pepper and before you know it you have created a new family favorite.

Though my photos show I made three stuffed peppers, I had enough stuffing to do four; I just didn’t have a fourth pepper available to stuff. : )

Stuffed Peppers Ole’

Preheat oven to 350 degrees. Oil a baking dish that will hold the peppers.
Serves 4-6, depending on the size of peppers you stuff

Ingredients:
  • 1 cup cooked rice (white, brown, doesn’t matter)
  • 1 cup chopped green bell pepper
  • 1 cup chopped red bell pepper (or whatever color you wish)
  • 1 medium onion chopped
  • 4 bell peppers, single serving size, tops off, and seeded
  • 1/2 to a whole roll of breakfast sausage (depends on how big your peppers are and how much you have to fill)
  • 1-2 cloves garlic, chopped
  • 1 can diced Rotel tomatoes
  • 1 jar Salsa Verde (or regular salsa)
  • to taste; black pepper, garlic powder, salt, chili powder, chili flakes, cayenne pepper.

Instructions:
  1. Cook rice according to package instructions. Set aside to cool.
  2. In a skillet saute onions, garlic and chopped peppers until the onions are clear. 
  3. Add sausage and scramble into small pieces as it cooks.
  4. When sausage has browned, add half the rice and the can of diced Rotel tomatoes with their juice. Mix well.
  5. Season this mixture to your liking, making them as spicy as you wish. If you do not want Rotel tomato flavor, you can use any type of diced tomato.
  6. If it doesn’t appear to be enough filling for all the bell peppers you plan to bake, add more rice to the mixture.
  7. Arrange stuffed peppers in your baking dish. 
  8. Pour salsa on top
  9. Bake uncovered for 35-45 minutes, or until your main bell pepper is cooked through and soft.
  10. Serve with salad, garlic bread and other vegetables. I served ours with ranch style beans and jalapeno cornbread...and sweet tea.
Peppers ready for stuffing.
Sausage, onions, garlic and peppers.
Rice added to sausage and peppers mixture
Peppers stuffed and ready for topping.
Salsa Verde added and headed to the oven.
Stuffed Peppers Ole’ with Ranch Style Beans


The peppers I used were about the size of a coffee cup; not huge. Arthur loved them, by the way! And if you are wondering why I used a metal loaf pan...well...since I only had three, all may baking dishes were too big, and I was afraid they might fall over while they cooked. So I crushed the sides together on the foil pan so that wouldn’t happen.

If I had a garden, this would have been the perfect time to make that tomato/cucumber/onion salad! Yum!

Give this a try, it’s pretty easy and has a lot of flavor! Thanks for reading!!

As the mixing bowl turns,
Donna : - )

Friday, May 16, 2014

Wrap It Up: Light Summer Wrap Sandwiches

Summer Wrap Sandwich
SEver have a little salad left over from dinner? Not enough to use as a single serving, but too much to toss out? Well, throw it in a tortilla and make a Wrap Sandwich out of it for lunch!

There are a lot of tortilla varieties these days. My favorite is Mission, however, any tortilla will do. To be honest, my absolute favorite tortillas are from the Frontier Restaurant in Albuquerque, NM. They must use lard, cause those tortillas just melt in your mouth. Sorry. I digress.

The varieties I have chosen to use lately are the spinach, sun dried tomato and the traditional white ones. It will be up to you what you choose to fill your tortilla with; ham, turkey, tuna salad, leftover chicken, fish...the possibilities are endless.

Leftover dinner salad

Three varieties of wraps
Sun-dried tomato wrap


Okay, I will digress one more time. Back when we lived in Massachusetts, the kids were at some kind of practice or meeting just about every night. I was so tired of eating late, or eating out of a fast-food bag. One day, I had decided to make a pot roast, mashed potatoes, green beans, you get the idea. I had totally forgotten that in addition to Hunter’s Kung Fu practice (don’t judge) he also had a Boy Scouts meeting to work on his little wooden car. Here we go, I’ve spent the whole afternoon cooking and he will have to eat junk again! Then it hit me!! I could just put the meal in a big burrito tortilla! Addy saw me making it and said it looked awful. I didn’t care. I knew that Hunter would be hungry after Kung Fu practice. I was right! He gobbled the pot roast burrito meal down on his way to the scouts meeting and true to form, asked if I had made another one!  Hunter thought that was the greatest thing since sliced bread...or well...since a flour tortilla. I put down a layer of pot roast, followed with mashed potatoes, then gravy and topped it with green beans...tucked in the sides and rolled it all up. You can ask him, it’s still one of his favorite mealtime memories.

Now, back to the Wrap Sandwiches.  It’s pretty easy. Just fill the tortilla down the middle, tuck in the sides and give it a tight roll. This particular sandwich was with Miracle Whip (it was for Arthur, I’m a Mayo gal), smoked turkey and the bowl of salad that went untouched at dinner. I love adding avocado slices, or guacamole, onions, basically anything that cannot talk back.

Have fun rolling up your favorites this summer! It’s easy, quick and a welcomed change to the regular sack lunch.

As the mixing bowl turns,
Donna : - )


Monday, May 12, 2014

Orange you glad it’s cake: Mandarin Orange Bundt Cake with Orange Juice Glaze

Mandarin Orange Bundt Cake
My first Mandarin cake was in Las Cruces, NM. It was a hot day in the desert and that cake was cold out of the fridge with a fresh orange taste...it was just heaven! Thankfully, the hostess did not scold me for having three pieces. My supper that evening was cake. I am not ashamed to admit it.

Her recipe had a heavier icing. Very good, very rich. I have chosen to make a simple glaze. Yes, it’s because I did not want to go to the store. I am very much a make-do sorta gal. But, over the years, I have become more of a fan of simple glazes or just dusting a cake with powdered sugar. I’m all about the flavorful cake and less about the icing.

This cake is very moist, with a hint of orange flavor. You can see little bits of mandarin orange throughout the slices. The orange juice glaze adds just enough sweetness, but doesn’t take away from the overall cake flavor.

Here is my tweaked-out version of her cake, in bundt form. You can make yours in two layers if you wish. Bundts are just easier to take places and share. I also cheat a bit and use a yellow cake mix. If you are a purist, mix up the dry ingredients for a yellow cake then add the wet ingredients I have listed.

Mandarin Orange Bundt Cake
  • 1 yellow cake mix
  • 4 eggs
  • 1 cup vegetable oil
  • 1 (11oz.) can mandarin orange segments


Mix all the above ingredients together with a mixer. The mandarin orange pieces with almost disappear. (My particular can of mandarin oranges was only 10.5 ounces, so I filled the measuring up to 11 oz. with orange juice.)
Pour into a greased/floured bundt pan
Bake at 350 degrees for the time specified for bundt cakes on the box. (prob. about 45 min) A toothpick inserted needs to come out clean.

Orange Juice Glaze
  • 2 TBS butter melted
  • 1/2 box powdered sugar
  • 1 tsp vanilla
  • Orange juice


Melt butter in microwave in small mixing bowl. Add powdered sugar and vanilla. Next, slowly add orange juice to the powdered sugar mixture. Make it as runny or as thick as you wish. I have no idea exactly how much I used. Mine turned out more like a glaze instead of an icing. It’s totally your call.

Wait until the cake has cooled to apply glaze/icing. Refrigerate at least 20-minutes before serving. You can dress it up with fresh orange slices. This cake is even better the next morning with a cup of coffee!


Mandarin Orange Bundt Cake slice...Yum!

This cake kinda reminds me of one of those orange push-up ice cream pops I used to eat as a kid...but it’s cake! You could probably make it as cupcakes and just make the glaze less runny, more like a frosting.

Let me know how you do! I’m gonna create a page to post the photos you send me of your creations!

As the mixing bowl turns,
Donna ; - )

A Summer Smash Hit: Squash & Zucchini Casserole

Squash & Zucchini Casserole
I cannot begin to tell you how much the internet and social media has added to my culinary life. It is just amazing to me that I can have a random thought about a church potluck 30-years ago, and wishing I could have one more taste of ______. Well, thanks to the web, we can all Google combinations of ingredients or names and presto....there is the recipe! I have rediscovered my childhood recipes, one search at a time!

Recently, a dear college friend shared a family favorite, and I too remembered loving this dish as a kid in the 70s. However, me being me, I just felt the need to tweak it a bit and make it my own. It’s annoying to my family. Why can’t I just leave well enough alone. I know, I know. Heard it a zillion times. But I will say, this little experiment worked out pretty darn well, if I do say so myself.

The idea was hatched more out of an overabundance of zucchini in my crisper, than it was trying to be clever. Plus, I did not want to go to the store an get more yellow squash. Okay, so I’m thrifty. Shoot me! It is rich and buttery and the zucchini gives it just a tad bit of texture that the regular recipe does not have. It’s pretty much perfect. 

As with many recipes I tweak for my family, I made our version without the cheese. I don’t think it took away anything with regard to flavor, but made the recipe have fewer calories and fat. You can fix it either way.

Summer Squash & Zucchini Casserole


  • 4 cups cubed fresh yellow squash
  • 4 cups cubed fresh zucchini
  • 1 large onion, chopped

Squash & Zucchini Casserole ingredients
Squash, zucchini and onions in the pot.


Add these to a pot of water, boil until tender. Drain, smash and add the following ingredients:

All ingredients into the pot, mashed.
  • 1 can of cream of chicken soup
  • 2 eggs, already mixed together
  • 1 cup grated cheddar cheese
  • 1/2 stick melted butter
  • and a little black pepper...
Mix, mush up well then pour into a buttered casserole dish and cover with the following:
Adding cracker topping.
  • 1/2 cup grated cheddar cheese
  • 1 cup crushed Ritz or Townhouse crackers (any buttery type)
  • 1/2 stick margarine or butter melted


Sprinkle with the cheese, then cover with the cracker crumbs and drizzle the crumbs with the melted butter. Bake at 350 degrees for 40-45 minutes....when the top gets browned and a knife blade comes out clean when you stab it in the middle of the casserole.

After cracker topping is drizzled with melted butter

After it has browned and is bubbly and oh so yummy!
This side dish can go with just about anything. I like to serve it with fish. Living in New England I became a pro at baking fish and not drying it out. Our fish of choice is salmon. It’s pretty simple.

Baked Salmon seasoned and ready for the oven.
Wash the salmon off, pat it dry and place it, skin side down on a foil lined cookie sheet (or parchment paper lined). Drizzle sheet with olive oil. Add fish. Season with salt, black pepper, a little garlic....or use any seasoning blend you enjoy. Drizzle a little olive oil on top. 

The general rule I was taught, was to bake fish 8-minutes for every inch of thickness. With this slab of salmon, I turned the oven up to 400 degrees and baked it for 9 minutes. It was perfect. Sorry, I forgot to snap a photo after I took it out of the oven. I generally put 4-5 fresh lemon slices across the top as it bakes....I was just out of lemon that day. But it’s easy, quick and much healthier than frying it.

This technique can be used on any type of fish...even catfish filets.

(However, I must note that the side dish has butter and cheese in it...so what you save in being healthy with the baked salmon, is totally lost in the casserole.)

There you go, fresh garden veggies and fish. Give it a go! Maybe it will become a favorite of yours?

As the mixing bowl turns,
Donna ; - )